Ok for those who have plugged textures on a model we do it through building textures Diffuse Specular, Normal, and Glow Maps Etc. and then plug it in the designated slots. When we bring it into a game engine the different maps take different effects.
So what’s a material? Well a material is how light reacts to the surface, if you notice in Maya there are a few different types of Material pre-sets Lambert, Blin Phuong etc. Each material are for different specifications, what node based Material Editing allows is for artists, is to create a material network visually. Before this system, the programmers write up the scripts for the material. With Unreal Engine 4 and with its Physically Based Rendering, we are able to create Complex Materials quickly and visually see the effects of your shader network quickly within the Engine. This system is very useful when exploring what nodes do when creating a material.
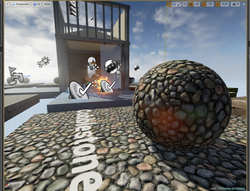
When you create a new project you can open a Level Called “Starter Map” in the start-up there is a default floor called Basic floor here the Unreal Team have nicely creating a scene with different types of Materials set upon a scene. When you open up the Material Editor you notice that it is a very simple material, you have a colour a metallic and a roughness. The Base Colour is what we call a Diffuse; back before PBR was introduced Diffuse drove everything, now you can make a simple texture look awesome just by creating a node system
Metallic controls how Metal like the Material is going to be and Roughness shows how rough the material is going to be, very simple. You can actually view the material in action in the view port It shows in real time right after the shaders have compiled, this is as simple as it can get.
Now take a look at the Cobblestone Pebble material.
Upon opening the Material at first i was overwhelmed by the sheer complexity look of the material, but upon further knowledge and understanding this is a very basic material.
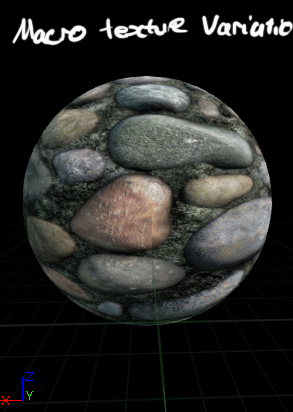
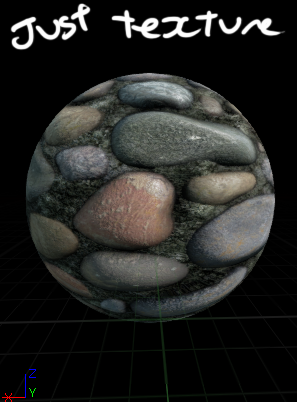
Back before PBR you would only need to build complex texture, but with PBR we can make materials look good and be uncontrolled what is pushed and pulled. The texture itself is actually located in the centre of the node network there are 6 main maps that are used to build this texture. On the bottom left, here we can see that we have a black and white version of the diffuse map. We have a black and white texture that drives the height of the material this it is plugged into a normal map before it is plugged in the normal node.Materials control light reacting on the model, the Specular is passed through a multiplier and the multiplier stated to be x4 of the original texture. The Macro Texture Variation is just for some differentiation on the texture you can see the comparison when i take off the material
Node Base Material System more powerful than ever!!!!
So what’s a material? Well a material is how light reacts to the surface, if you notice in Maya there are a few different types of Material pre-sets Lambert, Blin Phuong etc. Each material are for different specifications, what node based Material Editing allows is for artists, is to create a material network visually. Before this system, the programmers write up the scripts for the material. With Unreal Engine 4 and with its Physically Based Rendering, we are able to create Complex Materials quickly and visually see the effects of your shader network quickly within the Engine. This system is very useful when exploring what nodes do when creating a material.
When you create a new project you can open a Level Called “Starter Map” in the start-up there is a default floor called Basic floor here the Unreal Team have nicely creating a scene with different types of Materials set upon a scene. When you open up the Material Editor you notice that it is a very simple material, you have a colour a metallic and a roughness. The Base Colour is what we call a Diffuse; back before PBR was introduced Diffuse drove everything, now you can make a simple texture look awesome just by creating a node system
Metallic controls how Metal like the Material is going to be and Roughness shows how rough the material is going to be, very simple. You can actually view the material in action in the view port It shows in real time right after the shaders have compiled, this is as simple as it can get.
Now take a look at the Cobblestone Pebble material.
Upon opening the Material at first i was overwhelmed by the sheer complexity look of the material, but upon further knowledge and understanding this is a very basic material.
Back before PBR you would only need to build complex texture, but with PBR we can make materials look good and be uncontrolled what is pushed and pulled. The texture itself is actually located in the centre of the node network there are 6 main maps that are used to build this texture. On the bottom left, here we can see that we have a black and white version of the diffuse map. We have a black and white texture that drives the height of the material this it is plugged into a normal map before it is plugged in the normal node.Materials control light reacting on the model, the Specular is passed through a multiplier and the multiplier stated to be x4 of the original texture. The Macro Texture Variation is just for some differentiation on the texture you can see the comparison when i take off the material
Node Base Material System more powerful than ever!!!!


 RSS Feed